Network Storage & Time Machine Backups
OakHost offers affordable network storage for their customers for various different use cases. For example, network storage is a great way to automatically backup all critical data. That way, hardware, software or user error can easily be mitigated, as all backup is stored externally in a secure environment.
About OakHost Network Storage
Network Storage can be ordered as an add-on for server subscriptions and comes in various different storage tiers. It can be accessed via the SMB protocol, which is supported as the preferred network storage protocol by macOS by default.
For security reasons, external access to the SMB network storage is not permitted. Only customers of OakHost will have access to their storage product through their internal network. External access is blocked by our firewall.
Each network storage product comes with its own username and password, so only you have access to it. If you have multiple servers at OakHost, all servers can access the network storage, to enable easy file sharing between devices.
Configuring Network Storage
Follow the instructions below to connect to your Network Storage from macOS:
- Make sure you have purchased a Network Storage plan from OakHost. You can access the credentials in the Customer Panel.
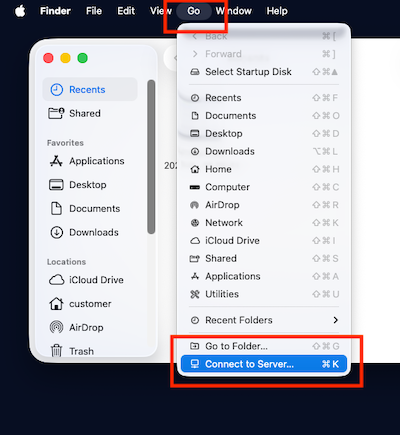
- Open
Finder, and select from the top menuGo => Connect to Server...
- Enter the share URL provided to you by the Customer Panel using the following format:
smb://your_user@your_user.storage.oakhost-customer.net/your_share
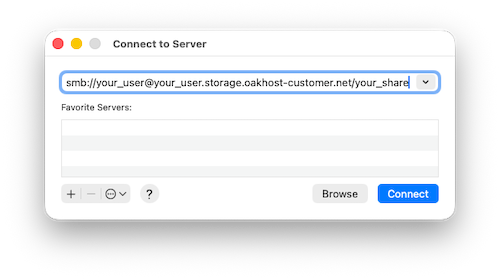
- Click
Connectand enter the network share password, as seen in the Customer Panel. If you like, you can check theRemember this password in my keychainoption for easy access. - Done. Your network share should appear on the Finder sidebar under
Locationsfor you to use.
For easier access, you can create a sub-folder in your network share and drag it to your Finder Favorites. That way, reconnecting to your share is as simple as clicking a button. Note however, that adding the share folder directly is not possible.
Setting up Time Machine Backups
If you would like to set up automatic Time Machine Backups to your Network Storage, first follow the above steps to connect to your share.
- Once connected to the share, open
System Settings, selectTime Machineand click onAdd Backup Disk....
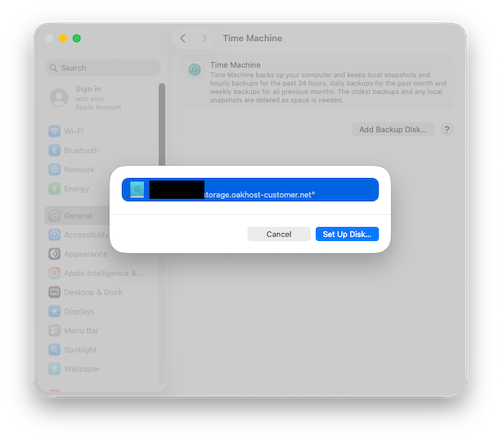
- Your Network Storage should appear in the list. Select it and confirm. Your initial backup will start soon.
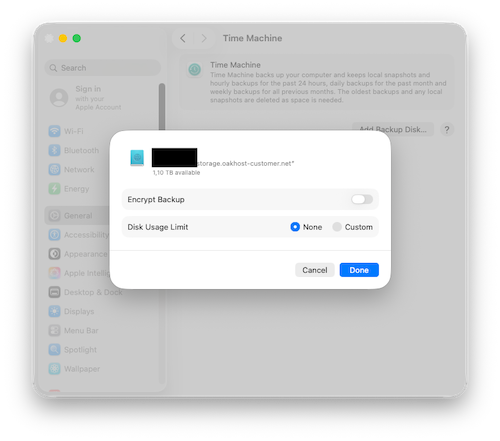
- All done. Your Mac is now set up to automatically backup to your Network Storage.